Reading email & configuring email clients at home:
If you want to read your ETH mails from home, you can either
- use the Exchange server web interface at mail.ethz.ch
- install and configure a email client software.
Further Information and Instructions to configure Mail-Clients can be found on the website of the central IT Services of ETH Zurich.
The automatic notification service enables an automatic response to your incoming emails, notifying the sender that you cannot currently answer to the message. The response message is user-defined, as well as the frequency and timing of sending the message.
The incoming emails are stored in your inbox as usual, so that you can read them even if the service is enabled.
- You can enable/disable/configure your vacation service on the email web interface (see link below)
- After login to the email web interface, click on the "Options" menu item at the upper right corner of the web page.
- Within the popup menu, click on "Set Automatic Replies...".
- You can then configure/set/activate/deactivate the vacation service.
The Exchange mail server allows you to configure the junk email filter settings.
You can either:
- deactivate the filter completely -> you will receive all emails
- configure filters by defining "safe senders and recipients" as well as "blocked senders".
How to configure Junk email filters
- The junk email filters can be configured on the web mail interface at mail.ethz.ch.
- After login, select "Options / Show all options" at the upper right corner of the web interface.
- On the left side, click "Block or Allow".
- By default, Junk email filters are disabled, i.e. the settings are set to allow all incoming mail to pass the filter. To define filters, click on "Automatically filter junk email".
- Define safe senders and blocked senders.
- One can also block or allow complete email domains by entering everything after the @-symbol in one of the two lists.
- Do not forget to save the changes by clicking on "Save" at the lower right corner.
- Note: Incoming emails identified as potential junk will now be stored in your "Junk email" folder on the mail server.
These instructions describe how to export and/or import email folders using Outlook. Note: The procedure below is written for Office 2010 (Windows).
To export emails from Outlook:
- Start Outlook
- In the upper left corner go to “File”, then click “Options”
- In the new window, click “Advanced” on the left side
- Now search “Export” on the right side, and click the button which is called “Export”
- In the “Import/Export Wizard” chose “Export to a file” and click "Next"
- Choose “Outlook Data File (.pst)” and click "Next"
- Now choose the folder which you want to export. If you want to export ALL mails, select the topmost item ( or similar)
- Save your file now to an appropriate location
To import emails to Outlook from a .pst file
- Start Outlook
- In the upper left corner go to “File”, then click “Options”
- In the new window, click “Advanced” on the left side
- Now search “Export” on the right side, and click the button which is called “Export”
- Select “Import from another program or file” and click "Next"
- Choose “Outlook Data File (.pst)” and click "Next"
- Select your previously exported .pst file, set the options as required and click "Next"
Note: You can delete the .pst file only after you have closed Outlook!
Accidentally deleted emails can be recovered relatively easily through the Outlook Web Interface (OWA). But this procedure will only work for 30 days, after that, the mailarchiv has to be used.
To recover emails through the OWA, follow those steps:
- Login on mail.ethz.ch/owa
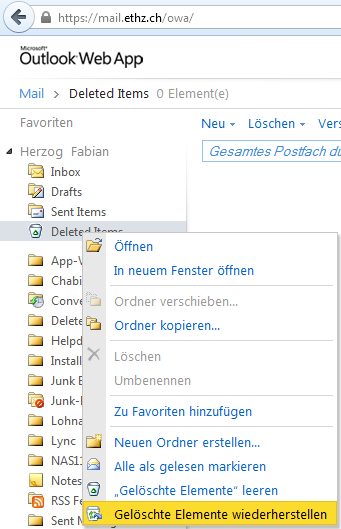
- Right-click on the folder “Deleted Items” and select “Gelöschte Elemente wiederherstellen” in the context-menu
- A new window will open in which you can select the emails you want to recover.
- Now select the emails you want to recover and click on the recovery-symbol (red marked in the picture below).
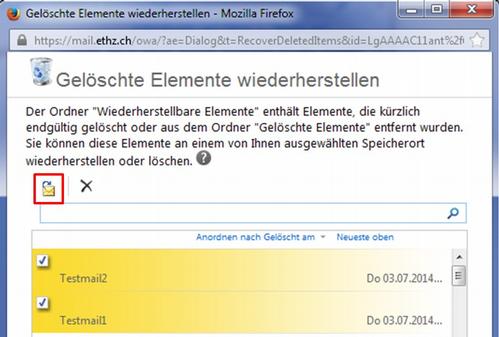
- In a final step, select the folder where the recovered items should be moved to.
If you need to share big files with others the usage of email is usually not a good solution. At ETH there are some good alternatives available for sharing big files. Which of the methods you choose depends on the people you want to share the data with. Below you will find the different methods for sharing big files at ETH.
People inside your institute or departement
You can use the institute or departement shared network drive. The instructions on how to use the network drives as well as the paths to your data are on our website as well.
People outside your instute or departement (or even outside ETH)
Use the "CIFEX file distribution system" of ETH
The "CIFEX file distribution system" of ETHZ is ideal, to share big files with specified people. The instructions on how to use cidex can be found on the website CIFEX Guide.
Downloads via temporary Websites
If you want to share data with non specified people you can do this using a temporary website which is provided by ISG D-HEST. After the creation of the website you can share the link to it with everyone you like. The instruction can be found on the Personal Website page.
Polybox
As an internal service provider the ID Systemservices (ID SD) created the service «polybox.ethz.ch» with 50 GB per person, storage on the ETH internal storagesystem.
Access to polybox
- Via Webbrowser: https://polybox.ethz.ch
- Via WebDav
- Via Mobile Sync Clients
- Via Desktop Sync Clients
Please notice that the folder from the Desktop Sync Clients/WebDav which is synchronised with Polybox can never be a replacement for the NAS-Storage from the It Services. Especially, the Folder should never contain the one and only copy or an original of a certain file. The recommended usag is, to change the files where they originally are stored and then copy it to the Polybox folder.
Important:
It is not allowed to use Dropbox or GoogleDrive to share research-data!